
- Changing Image Size
- Cropping an Image
- Adjusting Brightness and Contrast
- Adjusting Hue and Saturation
- Adjusting Color Balance
- Filters
- Text Tool
- Batch Processing
Changing Image Size
If you are working with a pre-existing image you may want to change the Image Size or Resolution to restrict the file size or dimensions.
Go to Image > Image Size ... and a window will appear:
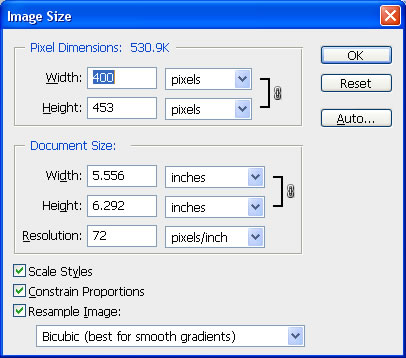
In the Pixel Dimensions section, clicking on the arrows will bring up a pull-down menu allowing you to choose Percent. You can Scale your image up by putting in a number greater than 100 or down by choosing a number between 1 and 100. Make sure Constrain Proportions and Resample Image are selected, otherwise your image will grow or shrink differently in each dimension, skewing the scale. If you wish to increase the resolution for better printing quality, while decreasing the overall image size, uncheck Resample Image . 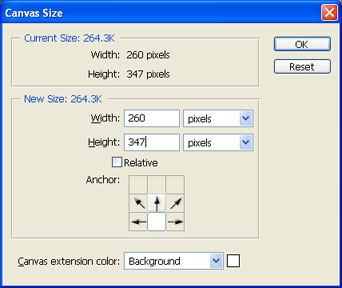
Resolution should always be set to 72 Pixels/Inch so that the new graphic will work with common monitor resolutions.
To make the changes to your document, Click OK .
To change the canvas size , either adding additional space to the image or clipping space off of the image, select Image > Canvas Size . By default, Photoshop will add canvas in the background color that has been selected. You can add (or delete) width, height, or both. The grid in the center of the dialog box indicates where the original canvas is oriented. In the example at the right, extra space will be added to the top and sides of the existing image.
Cropping an Image
If you would like to only use part of an existing image, select the Crop Tool from the Toolbar ( looks like a square with a line through it).
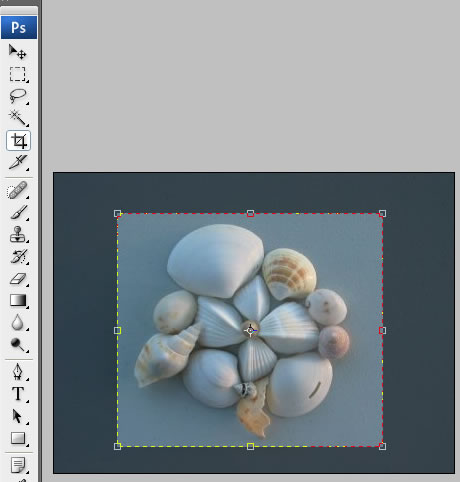
You can select the section you would like to keep by clicking a starting corner of the section (typically you would start with the upper left) and hold down the mouse button and drag the tool to the opposite corner (lower right).
This will create a dotted box around your selection, the part that will be cut away will be darkened and the inside of the selection will be normal brightness.
Move the Selection by clicking and dragging on the inside of it.
To Modify the Size or Shape of your selection, click and drag any of the boxes found in the corners and in the middle of the sides.
The image has not been modified yet. When satisfied with your selection hit Enter or Return on your keyboard. If you do not want to crop the image, hit Esc or click outside the cropped area or another tool.
Adjusting Image Brightness and Contrast
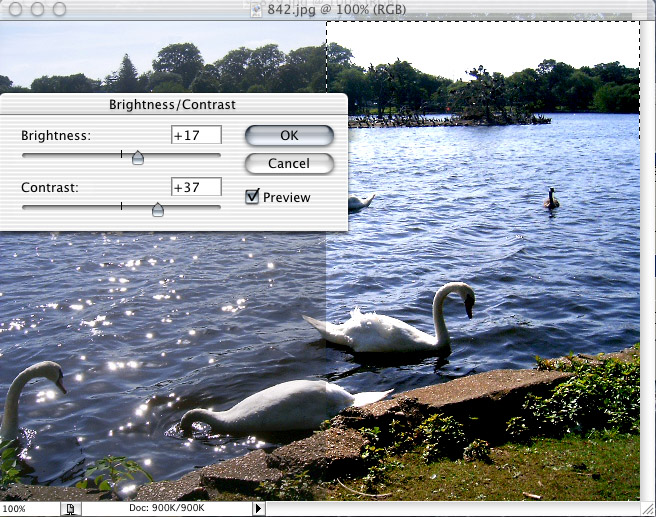
If an image is muddy looking or too bright, go to Image > Adjustments > Brightness/Contrast . If you have made a selection then only that selection will be changed (as seen below), otherwise it will change the entire image. Make sure Preview is checked so the changes are updated as you work. They will not be saved until OK is clicked. Setting Brightness and Contrast to 0 will return the image its initial state. When adjusting Brightness, it is best to compensate with Contrast. This will maintain the detail of your image. Lowering Contrast will "grey out" an image.
Adjusting Image Hue and Saturation
Open the image and go to Image > Adjustments > Hue/Saturation .
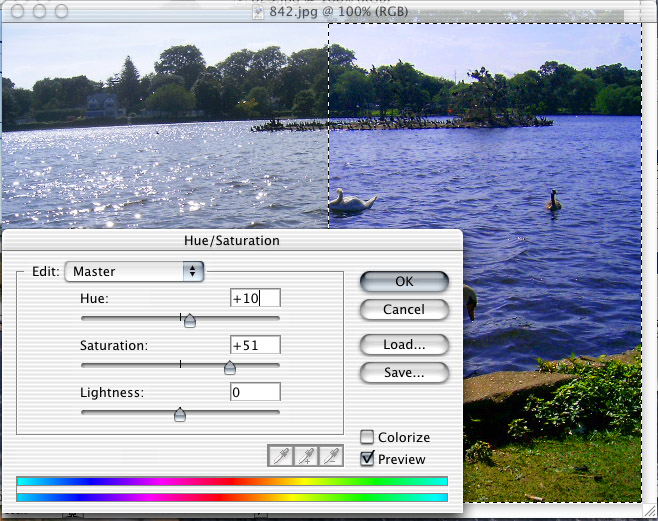
Hue is the color reflected from or transmitted through an object. Changing the Hue will change the actual color reflected. Blue will become yellow with an increase in Hue. The effects of this can be balanced with Saturation .
Saturation is the strength or purity of a color. Increasing Saturation will make the colors more vivid and they will approach their Primary Color parent. Decreasing Saturation will dull the image, and eventually , desaturating the image will make it Black and White.
Lightness works essentially the same way as Brightness. Try different combinations of adjustments to get the most out of your image.
Adjusting Color Balance
Color Balance is useful for color correcting poorly taken digital photographs or scans of poorly developed photographs. Often a photo will have a magenta or green tone like the left side of the image below. To counter a green discoloration move the Magenta/Green Slide toward Magenta (as seen on the right side of the image below). If the image is pink, slide toward Green. For overall picture adjustments, it is best to select Midtones in Tone Balance .

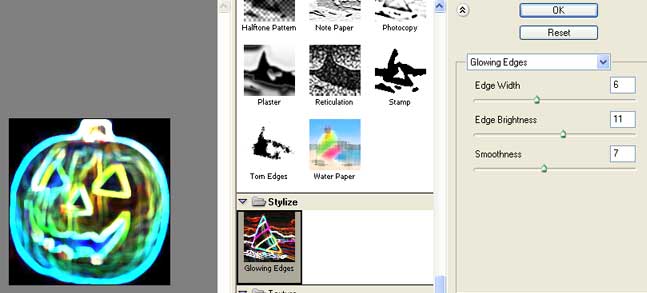
Filters
Text Tool
 The Text Tool can be used to add text to an image. To input text, select the Text Tool
 ![]() , located in the Tools window. If the Tools window is not open, go to Window > Tools . Tools should be checked. Place the cursor where the text should begin, and type in the desired text.
, located in the Tools window. If the Tools window is not open, go to Window > Tools . Tools should be checked. Place the cursor where the text should begin, and type in the desired text.
Text can be modified in a variety of ways, including for color, direction, style, size, justification, and color. These features can be edited by using either the Options window, or by using the Character and Paragraph palettes. These choices can be found by going to Window and then checking the desired pallete. If you may want to edit the text later on, save the file as a .psd so that the text layer can still be modified.
Batch Processing
Batch Processing is a procedure that can be split into two components: recording an action and applying the action. Before beginning, all the images that are to batch processed should be in one folder. Create a copy of this folder to use for the batch processing so that you may still retain the original images.
Recording an Action
- Launch Photoshop, and open an image that you would like to process.
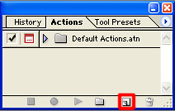
- Open the Actions window. To see if it is already open, go to Windows > Actions. Actions should be checked.
- Click on the New Action button in the Actions window.
- In the window that pops up, give your action a Name (i.e Resize), and make sure the Set field is set to Default Actions.atn. Assign a Function Key and set a Color if desired. Click Record.

- Make all the modifications you would like to make to the image, including saving the file.
- Click on the Stop button in the Action window. This creates the action, which can now be applied to the entire folder of images.

Applying the Action
- Go to File > Automate > Batch...
- In the window that pops up, make the following settings modifications, using the image below as a guide:
- In the Play section, the Set field should read Default Actions , and the Action field should read the Name of the action you created.
- In the Source section, Override Action "Open" Commands should be unchecked , while Include All Subfolders, Suppress All Profile Warnings and Suppress File Open Options Dialogs should be checked. Use the Choose button to select the folder containing the images that you would like to batch.
- In the Destination section, Override Action "Save As" Commands should be unchecked. Use the Choose button to select the folder where the batched files should be saved.
- In the File Naming section, Document Name should be selected in the first column, and extension should be selected in the second column.
- In the Errors sections, Errors should read Log Errors to file . Click on the Save As button, and give the log file a name, for example resize.txt . Save the log file to the Desktop
.
- Click OK . Photoshop will begin to batch process your files.